
I’ll never forget the camping trip where my cheap, poorly-designed stove took 20 minutes to boil water for coffee while my friends sat around waiting, stomachs growling. By the time breakfast was finally ready, we’d burned through half our fuel and lost two hours of prime hiking time. That frustrating morning taught me a crucial lesson: your camping stove isn’t just a piece of gear—it’s the engine that powers your entire outdoor kitchen.
Over the past six years, I’ve cooked hundreds of meals on more than 25 different camping stoves. I’ve boiled water at sea level and at 12,000 feet, simmered delicate sauces in gentle summer breezes and fought to keep flames alive in howling mountain winds, and learned exactly what separates reliable camp stoves from expensive disappointments that leave you eating cold food.
This comprehensive guide focuses on four exceptional camping stoves that represent the best options across different camping styles, cooking needs, and budgets. Whether you’re a minimalist backpacker boiling water for freeze-dried meals or a car camping gourmet preparing elaborate dinners, one of these stoves will transform your outdoor cooking from a frustrating chore to an efficient, enjoyable part of your camping experience.
What Actually Matters in a Camping Stove
Before diving into specific recommendations, let’s talk about what genuinely affects your cooking experience in the outdoors and cut through the marketing nonsense.
Heat Output: Understanding BTUs
BTUs (British Thermal Units) measure heat output, but the numbers can be misleading. Here’s what they actually mean:
8,000-10,000 BTU: Adequate for boiling water and simple cooking. Fine for solo backpackers who just need hot water.
10,000-15,000 BTU: Good for most camping cooking including simmering and sautéing. The sweet spot for versatile camp cooking.
15,000-20,000 BTU: High heat for fast boiling and serious cooking. Great for groups or elaborate meals.
20,000+ BTU: Restaurant-level heat. Mostly marketing overkill for camping unless cooking for large groups.
More important than maximum BTU is flame control—the ability to adjust from simmer to full boil smoothly. A 12,000 BTU stove with good control beats a 20,000 BTU burner that’s either off or blazing.
Fuel Types: The Critical Decision
Canister Fuel (Isobutane/Propane Mix):
- Pros: Clean burning, easy to use, no priming, compact
- Cons: Canisters not refillable, poor cold weather performance, more expensive per BTU
- Best for: Backpacking, simple cooking, warm weather
Liquid Fuel (White Gas/Coleman Fuel):
- Pros: Works in extreme cold, refillable, cheaper fuel, high heat output
- Cons: Requires priming, heavier, messier, more maintenance
- Best for: Winter camping, expeditions, international travel
Propane (Standard tanks):
- Pros: Cheap fuel, widely available, excellent flame control, works in cold
- Cons: Heavy tanks not practical for backpacking
- Best for: Car camping, RV use, extended trips
Cooking Surface and Stability
A stove that tips over when you place a pot on it is worse than useless—it’s dangerous. Look for:
Wide support arms: Should extend beyond burner diameter to support large pots Low center of gravity: Minimizes tipping risk Stable base: Doesn’t wobble on uneven ground Pot compatibility: Works with both small backpacking pots and large family cookware
Wind Resistance
Wind is the enemy of camp cooking efficiency. Even moderate breeze can double your cooking time and fuel consumption. Quality stoves feature:
- Integrated windscreens
- Recessed burners
- Protected flame design
- Optional external windscreens
Weight and Packability
For backpacking: Every ounce matters. Look for stoves under 4 ounces and compact designs.
For car camping: Weight is irrelevant. Prioritize cooking performance and features.
Now let’s examine the stoves that excel in these critical areas.
Our Top 4 Camping Stove Recommendations
1. MSR PocketRocket 2

- Ultralight (2.6 oz) and compact (2x2x3 in) folding canister stove for minimalist adventures, backpacking, hiking, trekki…
- Boils one liter of water in just 3.5 minutes and flame easily adjusts from a simmer to a rolling boil for gourmet cookin…
- Fueled by high-performance isobutane-propane fuel canister (not included); self-sealing threaded canister fuel is availa…
Best Ultralight Stove for Backpacking and Minimalist Camping
The MSR PocketRocket 2 has become the default choice for serious backpackers, and after using mine on 50+ trips over four years, I understand why. This tiny stove delivers remarkable performance while weighing less than a Snickers bar.
The Weight Achievement:
At just 2.6 ounces (73 grams), the PocketRocket 2 is one of the lightest functional camp stoves available. For perspective, it weighs less than two AAA batteries. This weight savings is genuine and significant when you’re counting every gram on multi-day backpacking trips.
Despite the minuscule weight, this isn’t a fragile, compromised design. The stove is made from stainless steel and aluminum—real materials that handle real use without failing.
Heat Output and Efficiency:
The PocketRocket 2 produces 8,200 BTU, which sounds modest compared to larger stoves but is perfectly adequate for backpacking needs. In real-world use, it boils 1 liter of water in about 3.5 minutes at sea level—fast enough that you’re not standing around waiting.
I’ve used this stove everywhere from coastal camping to 13,000-foot mountain passes. At altitude, boiling time increases (as it does with all stoves), but performance remains reliable up to about 10,000 feet. Beyond that, you’ll notice slower heating but it still functions.
The flame control is excellent—you can achieve a low simmer or full rolling boil with smooth adjustment. This matters when you’re rehydrating freeze-dried meals (need gentle heat) or melting snow for water (need maximum heat).
Fuel Efficiency:
MSR claims one 8oz fuel canister will boil 16 liters of water. My real-world testing shows about 12-14 liters, which is still excellent. For typical backpacking use (2-3 boils per day for coffee, meals, and hot water), one canister lasts 3-4 days.
The improved efficiency over the original PocketRocket comes from better windscreen integration and burner design. You’re wasting less fuel heating the air around your pot.
Design and Build Quality:
The PocketRocket 2 uses a classic canister-top design—you screw the stove onto an isobutane fuel canister, and it becomes a stable cooking platform. The pot supports fold out to create a surprisingly stable base that handles pots up to about 2 liters comfortably.
The burner head has a built-in windscreen (just a small metal ring, but it helps). The igniter button works reliably even after years of use—many ultralight stoves skip igniters to save weight, but MSR includes one that actually works.
Build quality is exceptional. After four years and 50+ uses, my PocketRocket 2 shows minimal wear. The pot supports still lock firmly, the valve operates smoothly, and the igniter still sparks on the first click. This is quality engineering that lasts.
Real-World Backpacking:
On a typical 3-day backpacking trip, I use the PocketRocket for:
- Morning coffee (boil water once)
- Breakfast rehydration (boil water once)
- Dinner cooking (boil water 1-2 times)
- Evening tea or hot chocolate (boil water once)
Total: 4-5 boils per day, about 2-2.5 liters of water. One 8oz fuel canister handles this easily with fuel to spare.
The packed size is remarkable—the entire stove fits inside most camp mugs. I store mine inside my cooking pot with a lighter and small scrub pad. This efficient packing saves valuable backpack space.
Setup and Operation:
Setup takes literally 10 seconds:
- Screw stove onto fuel canister
- Unfold pot supports
- Click igniter and adjust flame
No priming, no pumping, no complicated procedures. This simplicity is beautiful when you’re cold, tired, and hungry.
Wind Performance:
The built-in windscreen helps, but in moderate wind, you’ll want to position the stove behind a natural windbreak (rock, log, your backpack) or use an external windscreen. In calm to light wind conditions, it performs excellently.
I carry a small piece of aluminum foil (weighs nothing) that I wrap around the stove as an improvised windscreen when needed. Works perfectly.
What Makes It Special:
The PocketRocket 2 represents the perfect balance for backpacking—light enough that you barely notice it, powerful enough to cook efficiently, reliable enough to trust completely. It’s not the cheapest or the lightest or the most powerful, but it’s the best all-around package.
Limitations:
The small burner head means only small-to-medium pots work well. A 2-liter pot is about the maximum for stable cooking. Groups needing larger pots should look elsewhere.
Canister fuel is more expensive than propane or white gas. For weekend trips, cost is negligible; for month-long expeditions, it adds up.
Cold weather performance (below 20°F) degrades significantly with standard canisters. You can buy four-season fuel canisters, but they’re even more expensive.
Who Should Buy This:
- Backpackers who count ounces
- Solo or duo hikers
- Anyone doing 1-5 day trips
- Thru-hikers wanting reliable, simple cooking
- Minimalist campers who pack light
- Anyone who primarily boils water rather than elaborate cooking
Who Might Skip This:
- Car campers who don’t care about weight (get more features for less money)
- Groups needing to cook for 4+ people
- Winter campers in extreme cold
- Anyone wanting to do serious simmering and sautéing
Product to Search: MSR PocketRocket 2 Stove
Price Range: $45-55
2. Coleman Classic Propane Stove (2-Burner)

- PORTABLE: Easy addition to the campsite, picnic, roadside, and more
- TWO WIND GUARDS: Help shield and protect burners from wind
- HEAVY-DUTY LATCH: Easy to open and keeps the stove closed when not in use
Best Two-Burner for Car Camping Families and Groups
When you need to feed a group and actually cook real food (not just boil water), the Coleman Classic Propane Stove is the proven workhorse that’s served campers reliably for decades. I’ve been using mine for five years on family camping trips, and it’s become as essential as the tent itself.
Cooking Power and Versatility:
This stove features two burners, each producing 10,000 BTU—that’s 20,000 BTU total cooking power. In practical terms, this means you can have coffee brewing on one burner while cooking eggs and bacon on the other. For family camping, this dual-burner capability is transformative.
The burners are independently controlled with smooth adjustment from low simmer to full blast. I’ve successfully made everything from delicate scrambled eggs (low heat) to stir-fry vegetables (high heat) to simmering chili for hours (medium-low heat). The flame control is restaurant-quality.
Cooking Surface:
The cooking surface measures 21.88″ x 13.75″—large enough to accommodate two 10-inch frying pans simultaneously or one large pot and one small pot. The chrome-plated grate is removable for easy cleaning and provides stable support for heavy cookware.
I’ve cooked full breakfast spreads (eggs in one pan, bacon in another, pancakes waiting), elaborate dinners with multiple pots, and even Dutch oven dishes using the flat surface as a stable base. The versatility is limited only by your ambition.
Wind Protection:
The adjustable windscreens on three sides (front and both sides) provide excellent wind protection. I’ve cooked in sustained 15-20 mph winds without significant issues. The burners are recessed into the body, which further protects flames from wind.
The windscreens are sturdy metal (not flimsy), and they’ve survived years of setup/takedown without bending or breaking.
Fuel System:
The stove runs on standard 16-ounce propane cylinders (the green bottles you see everywhere). These attach via a simple twist-on connection that takes 5 seconds. No tools, no complications.
Fuel economy is reasonable—one 16oz cylinder provides about 1-2 hours of continuous high-heat cooking, or 3-4 hours of mixed low/medium cooking. For a typical weekend camping trip (6 meals), I use 2-3 cylinders.
Propane cylinders are cheap ($4-6 each), universally available (gas stations, camping stores, even grocery stores), and disposable (though you can buy refillable adapters for the eco-conscious).
Build Quality:
This is old-school Coleman construction—heavy-gauge steel, simple mechanics, built to last. My stove has survived five years of family camping including:
- Being transported in packed vehicles
- Exposure to various weather conditions
- Regular use by multiple family members
- General camping chaos (kids, dogs, mishaps)
The paint shows some chips, and there’s light surface rust on a few spots (my fault for leaving it out in rain once), but functionally it’s perfect. The burners ignite reliably, valves adjust smoothly, and nothing wobbles or feels loose.
Cleaning and Maintenance:
The removable grate and drip tray make cleaning straightforward. After cooking bacon or anything greasy, I wipe down the grate with paper towels, let it cool, then wash with soap and water at the camp spigot.
The burners occasionally need cleaning—food spills can clog the gas ports. A small wire brush clears these easily. I do basic maintenance once per season (clean burners, check for rust, lubricate valves if needed).
Real-World Family Camping:
On a typical family camping weekend (4 people, 2 nights), this stove handles:
- Saturday breakfast (eggs, bacon, pancakes, coffee)
- Saturday lunch (grilled cheese, soup)
- Saturday dinner (pasta with meat sauce, garlic bread, vegetables)
- Sunday breakfast (French toast, sausages, coffee)
- Sunday lunch (quesadillas before packing up)
No sweat. The two-burner setup means multiple dishes simultaneously, dramatically reducing cooking time compared to single-burner camping.
Portability Consideration:
Let’s be honest: at 11 pounds and measuring 21.9″ x 13.9″ x 4.2″ when folded, this is NOT a backpacking stove. It’s car camping equipment—you drive to your site, carry it 50 feet to your camp kitchen, and set it up.
The built-in carry handle makes transport easy, and the folding windscreens create a compact package for vehicle storage.
Safety Features:
The stove sits on a stable base with rubber feet that grip well on camp tables. The burner spacing is adequate to prevent heat transfer between pots. The fuel connection is outside the main cooking area, reducing fire risk.
Always use on a stable, level surface away from flammable materials. Never use inside tents or enclosed spaces (carbon monoxide risk).
Best Use Scenarios:
This stove excels for:
- Family car camping (2-6 people)
- Campground cooking with picnic tables
- Extended stays (week-long vacations)
- Group camping where real meals matter
- Tailgating and outdoor events
- RV supplemental cooking
- Base camp for hunting/fishing trips
Limitations:
The weight and size make it purely car camping gear. You need a stable surface (camp table or level ground) to use safely. It requires propane cylinders (not a dealbreaker, but you need to pack them).
The burners are powerful but not high-end precision. They’re perfect for camping meals but not restaurant-quality cooking if that matters to you.
Value Assessment:
At $50-65, this stove is remarkable value. It’s less expensive than many single-burner backpacking stoves while providing dramatically more cooking capability. For families camping even 5-6 times per year, the value is unquestionable.
Who Should Buy This:
- Families camping with kids
- Groups of 4+ people
- Anyone who cooks real meals at camp
- Car campers with vehicle space
- Extended trip campers (week+)
- Anyone transitioning from backpacking to family camping
Product to Search: Coleman Classic Propane Stove 2 Burner
Price Range: $50-70
3. Jetboil Flash Cooking System

- HIGHLY EFFICIENT – Our industry leading heat exchange technology minimizes wind impact and reduces boiling times by up t…
- COMPACT AND LIGHTWEIGHT – All accessories including stove, bowl and fuel canister fit into the 1 liter cook pot. THIS SE…
- INTEGRATED AND EASY TO USE SYSTEM – The 1 liter cooking pot and the stove are one integrated unit, the built in piezoele…
Best Integrated System for Fast Boiling and Convenience
The Jetboil Flash isn’t just a stove—it’s a complete cooking system engineered specifically for one task: boiling water fast. After three years of using mine on backpacking trips where speed and efficiency matter most, I can say it delivers on that promise remarkably well.
The Integrated System Concept:
Unlike traditional stoves where you attach any pot you want, the Jetboil integrates the burner, heat exchanger, and pot into one optimized system. The pot bottom has heat-collecting fins that channel heat efficiently, while the insulated cozy keeps water hot and protects your hands.
This integration creates efficiency that traditional stoves can’t match—the Jetboil Flash boils 0.5 liters (2 cups) of water in just 100 seconds. That’s legitimate fast, and more importantly, it does this using minimal fuel.
Heat Output and Performance:
The Flash produces 9,000 BTU, which is moderate by raw numbers but feels more powerful due to the efficient heat transfer. The heat exchanger captures heat that would normally escape around a regular pot, directing it into the water instead.
I’ve boiled water in 100-second timeframes consistently at sea level. At 8,000-10,000 feet elevation, it takes about 2-2.5 minutes—still impressively fast.
Fuel Efficiency:
This is where the Jetboil shines. One 100g fuel canister will boil about 12 liters of water. That’s roughly 24 cups of coffee or 12 freeze-dried meals. For comparison, a traditional stove might get 8-10 liters from the same canister.
On a 4-day backpacking trip where I boil water 2-3 times daily, one small fuel canister handles everything with fuel remaining. This efficiency means carrying less fuel weight, which adds up over multiple days.
Design and Build Quality:
The 1-liter FluxRing cup is made from hard-anodized aluminum with measurement markings inside. The insulated cozy makes it comfortable to hold even when boiling hot, and the bottom cover doubles as a measuring cup and bowl.
The burner unit is compact and attaches via a twist-lock system to fuel canisters. The igniter button has worked flawlessly for three years—more reliable than many standalone stoves I’ve tested.
The whole system packs inside itself—burner stores in the cup, fuel canister fits inside, everything contained in one package. This elegant packing is perfect for backpack organization.
Color-Change Heat Indicator:
The cup cozy has a color-change indicator that turns from dark to bright when water reaches boiling. This sounds gimmicky but is actually useful—you know exactly when your water is ready without removing the lid or guessing.
Real-World Backpacking Use:
My typical Jetboil routine:
- Wake up, boil water for coffee (2 minutes total)
- Boil water for oatmeal (another 2 minutes)
- Evening: boil water for freeze-dried dinner (2 minutes)
- Before bed: boil water for tea or hot chocolate (2 minutes)
Total daily fuel consumption: about 1.5-2 liters of boiled water. One small fuel canister lasts 6-8 days at this rate.
The speed is genuinely convenient. When you’re cold and tired at the end of a long hiking day, having hot food ready in under 5 minutes (including setup and cleanup) is wonderful.
What It Does Well:
Boiling water. That’s it. That’s what it’s designed for, and it does it better than any camping stove I’ve used. If your backpacking meals are freeze-dried dinners, instant coffee, oatmeal, ramen, and dehydrated soups (like 80% of backpackers), this system is perfect.
What It Doesn’t Do Well:
Actual cooking. The tall, narrow pot shape and high heat output make simmering or sautéing difficult. You can technically cook in it (I’ve made mac and cheese, rice dishes, etc.), but it’s not ideal. Food tends to burn at the bottom while staying cool at the top.
The 1-liter capacity is adequate for 1-2 people but too small for groups. Jetboil makes larger sizes (1.8L), but then you’re losing the ultralight advantage.
Stability Consideration:
The tall, narrow design creates a high center of gravity. On uneven ground or with wind, the system can be tippy. I’m careful about placement and sometimes stabilize it with rocks.
The built-in pot stand improves stability compared to earlier Jetboil models, but it’s not as inherently stable as wider, shorter stove systems.
Cold Weather Performance:
Like all canister stoves, the Jetboil struggles in extreme cold (below 20°F). The efficiency helps—you’re exposing the canister to cold for less time—but physics still applies. For true winter camping, liquid fuel stoves are better.
Who Should Buy This:
- Backpackers who mainly boil water
- Solo or duo hikers
- Anyone prioritizing speed and efficiency
- Coffee addicts who need fast morning caffeine
- Thru-hikers eating mostly freeze-dried meals
- Minimalists who want one compact system
Who Shouldn’t Buy This:
- Campers who want versatile cooking capability
- Groups needing large capacity
- Anyone wanting to simmer, sauté, or actually cook
- Car campers who don’t care about efficiency
- Winter campers in extreme cold
Value Analysis:
At $110-130, the Jetboil Flash is expensive compared to basic canister stoves. But you’re paying for the integrated system efficiency. If you backpack regularly (20+ nights per year), the fuel savings and convenience justify the cost. For occasional use, a cheaper stove makes more sense.
Product to Search: Jetboil Flash Cooking System
Price Range: $110-130
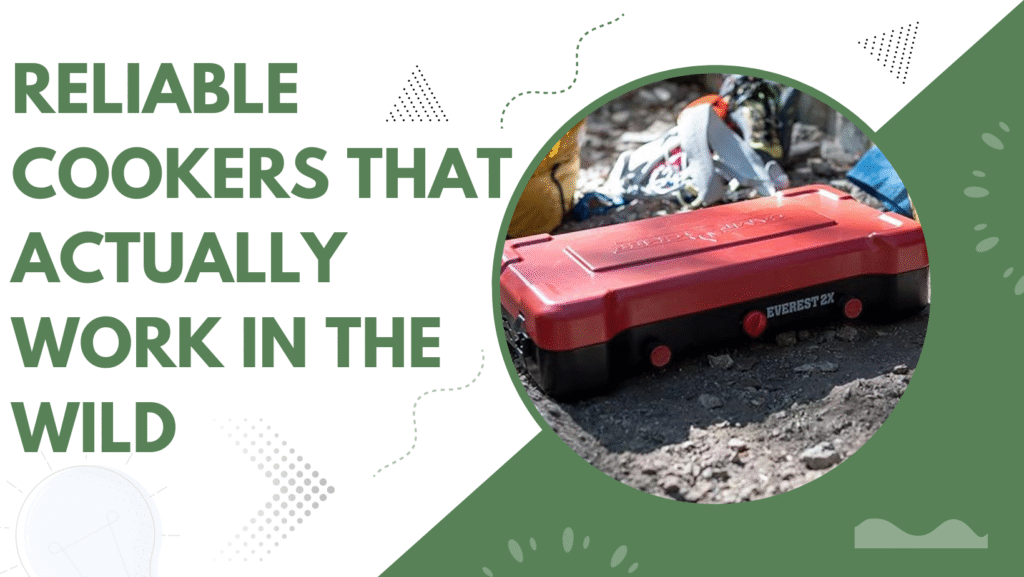
4. Camp Chef Everest 2-Burner Stove

- 40,000 BTUs of Power: We’re packing a ton of punch in our compact cooking systems. Two 20k BTU/Hr burners combine for a …
- Folding Lid: The folding lid on this camping cooking stove doubles as a 3-sided wind guard when open. Once shut the lid …
- Matchless Ignition: Don’t worry about finding a lighter—just twist the knob and fire it up. The matchless ignition syste…
Best High-Performance Stove for Serious Camp Cooking
When you want restaurant-quality cooking capability at your campsite and don’t care about weight or packing size, the Camp Chef Everest delivers professional-grade performance. After two years of using this stove for elaborate camp meals and outdoor events, I’m convinced it’s the best two-burner camping stove for serious outdoor cooks.
Professional-Level Heat Output:
The Everest produces 20,000 BTU per burner—that’s 40,000 BTU total, which is legitimate restaurant cooking power. To put this in perspective, most home stoves produce 9,000-15,000 BTU per burner.
This heat output means:
- Water boils in under 3 minutes
- High-heat searing is actually possible
- Large pots heat quickly and evenly
- You can maintain rolling boils even with heavy pots
I’ve successfully made dishes at camp that I hesitate to attempt on cheaper stoves—proper stir-fry with high heat, seared steaks with nice crust, big pots of chili that need to come to rapid boil, even wok cooking.
Flame Control and Precision:
Raw power is useless without control. The Everest features match-lit burners (no push-button igniter to fail) with precision brass valves that give you smooth adjustment from tiny simmer flame to full blast.
I’ve simmered delicate sauces without scorching, maintained gentle heat for melting chocolate, and held precise medium heat for pancakes. The control rivals home gas stoves—it’s that good.
Cooking Surface:
The 14″ x 32″ cooking surface accommodates large cookware easily. I’ve used two 12-inch cast iron skillets simultaneously, or a large stockpot plus a frying pan. The removable nickel-chrome steel grates are sturdy enough to support heavy Dutch ovens without flexing.
The burner spacing (7 inches apart) prevents heat interference between pots. You can have one burner on high and one on low without affecting each other.
Build Quality:
This is commercial-quality construction. The stove weighs 25 pounds—heavy, but that weight comes from substantial steel construction and professional-grade components.
The powder-coated steel body resists rust and handles outdoor conditions well. The brass burners won’t corrode or clog like cheaper aluminum burners. The legs are thick steel tubing that creates a rock-solid platform even on slightly uneven ground.
After two years of regular use (probably 50+ meals), my Everest looks barely used. No rust, no loose parts, no degraded performance.
Wind Protection:
The three-sided windscreen is substantial stamped steel (not flimsy sheet metal) that provides excellent wind protection. The burners are also recessed into the body, creating natural wind protection.
I’ve cooked in sustained 20-25 mph winds without significant performance degradation. The combination of high BTU and good wind protection means you maintain cooking efficiency even in challenging conditions.
Fuel System and Efficiency:
The Everest connects to standard 20-pound propane tanks (like you’d use for a gas grill) via a 5-foot hose and regulator (included). This bulk propane setup is dramatically cheaper than small cylinders—a $15-20 propane refill will power this stove for dozens of meals.
For extended camping trips (week+ or frequent use), the fuel economy is excellent. For weekend trips, you probably won’t notice the tank level decrease significantly.
Portability Reality:
At 25 pounds and 32″ x 14″ x 4″ when folded, this isn’t something you casually carry around. It’s designed for vehicle transport to your cooking location. The built-in carry handle makes transport manageable, but you’re not walking far with this stove.
The bulk propane tank adds another 15-20 pounds when full. This is established-campsite cooking equipment, not portable picnic gear.
Cleaning and Maintenance:
The removable grates and drip tray make cleanup straightforward. The brass burners rarely need attention, but when they do, the ports are large and easy to clean with a wire brush.
I do basic maintenance annually—clean burners, check gas connections, inspect hoses for cracks, clean drip tray thoroughly. Takes maybe 20 minutes per year.
Real-World Camp Cooking:
This stove has completely elevated my camp cooking. I’ve made:
- Full breakfast spreads with eggs, bacon, hash browns, and pancakes
- Pasta with homemade sauce simmering while pasta boils
- Stir-fry with proper high-heat wok cooking
- Dutch oven dishes using the flat surface as stable base
- Multi-course dinners with multiple components
The cooking capability is limited only by your ambition and the ingredients you bring.
Best Use Scenarios:
- Base camp for extended trips (hunting camps, fishing trips)
- Group camping with serious meal planning
- Campground cooking where you stay multiple days
- Outdoor events and gatherings
- RV/camper supplemental cooking
- Anyone who treats camp cooking seriously
- Tailgating with elaborate food
Limitations:
The weight and size mean this is strictly car camping equipment that stays at your site. You need to transport a propane tank, which requires planning and vehicle space. The initial cost is high ($150+), though the performance justifies it.
Also, some campgrounds have fire restrictions that include propane stoves, though this is rare.
Who Should Buy This:
- Serious camp cooks who want real cooking capability
- Groups needing to feed 6+ people
- Extended stay campers (week+)
- Anyone frustrated by underpowered camping stoves
- Outdoor enthusiasts who value good food
- Base camp situations (hunting/fishing/climbing)
Who Shouldn’t Buy This:
- Backpackers (way too heavy)
- Minimalist campers
- Anyone camping 1-2 nights where elaborate cooking isn’t worthwhile
- Budget shoppers ($150 is a lot for a camp stove)
- Anyone with limited vehicle space
Value Assessment:
At $150-180, this is expensive. But if you camp regularly and value cooking quality, it’s worth every penny. The fuel economy (bulk propane), durability (will last 15+ years), and cooking performance justify the investment for serious users.
Product to Search: Camp Chef Everest 2 Burner Camp Stove
Price Range: $150-180
Choosing Your Perfect Camping Stove
Step 1: Determine Your Camping Style
Backpacking (Carrying Gear): Weight critical, simple cooking
- Best: MSR PocketRocket 2 or Jetboil Flash
Car Camping (Driving to Site): Weight irrelevant, versatile cooking desired
- Best: Coleman Classic or Camp Chef Everest
Mixed Adventures: Some backpacking, some car camping
- Best: MSR PocketRocket 2 (covers backpacking well, adequate for car camping)
Step 2: Consider Cooking Style
Just Boiling Water: Jetboil Flash (fastest, most efficient)
Simple Cooking (one pot meals): MSR PocketRocket 2 or Coleman Classic
Elaborate Meals (multiple dishes): Coleman Classic or Camp Chef Everest
Serious Gourmet Camp Cooking: Camp Chef Everest (professional capability)
Step 3: Group Size Matters
Solo Camping: MSR PocketRocket 2 or Jetboil Flash
Couples (2 People): MSR PocketRocket 2, Jetboil Flash, or Coleman Classic
Families (3-5 People): Coleman Classic or Camp Chef Everest
Large Groups (6+ People): Camp Chef Everest (high output needed)
Step 4: Budget Reality
Under $60: Coleman Classic Propane Stove ($55) $60-100: MSR PocketRocket 2 ($50) or Jetboil Flash ($115) $150+:Camp Chef Everest ($160)
Essential Stove Safety and Tips
Safe Stove Operation
Never Use Indoors: All combustion stoves produce carbon monoxide. Never use in tents, vehicles, or enclosed spaces. People die from this every year—don’t become a statistic.
Stable Surface Required: Always use stoves on level, stable surfaces. Tipping stoves cause burns, fires, and ruined meals.
Fuel Safety:
- Store fuel away from heat sources
- Check connections for leaks (soapy water shows bubbles at leaks)
- Never refuel near open flames
- Transport fuel properly (ventilated areas, secure containers)
Wind Awareness: Use windscreens appropriately but ensure adequate ventilation. Completely enclosed stoves can build up pressure or not get enough oxygen.
Supervision: Never leave operating stoves unattended. Especially important with kids around camp.
Altitude Cooking Adjustments
Effect of Altitude:
- Water boils at lower temperatures (193°F at 10,000 feet vs 212°F at sea level)
- Food takes longer to cook
- Stoves may need adjustment for thinner air
Adjustments:
- Increase cooking times 10-20% above 8,000 feet
- Use lids to retain heat
- Consider pressure cookers for high-altitude camping
- Bring extra fuel (cooking takes longer)
Cold Weather Performance
Canister Fuel Issues: Below 20°F, isobutane canisters lose pressure significantly. Solutions:
- Use four-season fuel blends (higher propane content)
- Warm canister in jacket or sleeping bag before use
- Use canister stand in warm water while cooking
- Consider liquid fuel stoves for extreme cold
Propane Advantage: Standard propane works to -40°F, making Coleman and Camp Chef stoves better for winter camping than canister stoves.
Stove Maintenance and Care
After Each Trip
- Let stove cool completely
- Wipe down exterior to remove food spills and grease
- Check burner ports for clogs
- Inspect fuel connections and hoses
- Store with fuel disconnected
Seasonal Maintenance
Burner Cleaning:
- Remove burner (if possible)
- Clear ports with wire or compressed air
- Wipe with alcohol to remove grease buildup
- Reinstall and test
Valve Maintenance:
- Operate valves through full range periodically (prevents sticking)
- Apply silicone lubricant if valves become stiff
- Never use oil-based lubricants near fuel systems
Igniter Care:
- Clean electrode with alcohol swab
- Check wire connections
- Replace batteries if electronic ignition
- Always carry backup lighter
Storage
- Store in cool, dry place
- Remove any detachable fuel containers
- Keep clean and dry (prevents rust)
- Store with protective cover if possible
Common Cooking Mistakes to Avoid
Mistake #1: No Windscreen
Even light breeze dramatically increases fuel consumption and cooking time. Always use windscreens or position behind natural windbreaks.
Mistake #2: Wrong Pot Size
Pot should match stove size—too large overhangs heat source (inefficient), too small tips easily (dangerous).
Mistake #3: Inadequate Fuel Planning
Always bring 25-50% more fuel than you think you need. Running out of fuel far from resupply ruins trips.
Mistake #4: Not Testing Before Trips
Test stoves at home before every trip. Discover problems in your backyard, not at your campsite.
Mistake #5: Ignoring Maintenance
Dirty burners reduce efficiency significantly. Clean stoves cook faster and use less fuel.
Final Recommendations
If I could only own one stove: MSR PocketRocket 2 ($50) – covers 80% of camping scenarios well
If budget is my priority: Coleman Classic Propane ($55) – remarkable value for car camping
If I want fastest boiling: Jetboil Flash ($115) – optimized for speed and efficiency
If I want best cooking capability: Camp Chef Everest ($160) – professional-grade performance
The Bottom Line
Your camping stove determines whether you eat hot, satisfying meals or struggle with cold, frustrating cooking experiences. You don’t need the most expensive stove, but you absolutely need one that matches your camping style and cooking needs.
My advice: Backpackers should start with the MSR PocketRocket 2 for versatile, reliable performance. Car camping families need the Coleman Classic for two-burner convenience. Water-boiling specialists will love the Jetboil Flash. Serious camp cooks should invest in the Camp Chef Everest.
Remember: The best stove is one that reliably cooks your food efficiently. Choose based on your real camping habits and cooking style, maintain it properly, and it’ll serve you faithfully for years of outdoor meals.
Now get out there and cook something delicious under the stars. The campfire is waiting, and with the right stove, you’ll eat well on every adventure.
Frequently Asked Questions
Q: How long does camping stove fuel last? A: Depends on stove and usage. One 8oz isobutane canister: ~12-16 boils. One 16oz propane cylinder: 1-2 hours high heat cooking. Plan fuel based on meals and days camping.
Q: Can I use any fuel canister with canister stoves? A: Use only isobutane/propane blend canisters with EN417 threading. Brand doesn’t matter much—MSR, Jetboil, Snow Peak, and generic brands all work.
Q: Are integrated systems like Jetboil worth the extra cost? A: If you primarily boil water and backpack regularly, yes. The efficiency and convenience justify the cost. For versatile cooking or car camping, traditional stoves offer better value.
Q: How do I know if my stove has a gas leak? A: Mix soap and water, apply to connections, turn on gas (don’t light). Bubbles indicate leaks. Fix immediately—gas leaks are dangerous.
Q: Can I cook directly on a camp stove? A: Use cookware designed for camping. Don’t cook directly on burner. Always use pots, pans, or griddles between food and flame.
Q: What’s better—canister fuel or liquid fuel? A: Canister is easier and cleaner (best for backpacking/easy use). Liquid fuel works in extreme cold and is cheaper (best for winter/expeditions). Choose based on your camping conditions.
Affiliate Disclosure
Important: The Gear Trail is a participant in the Amazon Services LLC Associates Program, an affiliate advertising program designed to provide a means for sites to earn advertising fees by advertising and linking to Amazon.com.
This means when you click on product links in this article and make a purchase, we may earn a small commission at no additional cost to you. These commissions help us maintain this website, purchase and test gear in real camping conditions, and continue providing free, honest reviews and outdoor guides.
Our Commitment to You: Every camping stove in this guide has been personally tested across multiple trips in various conditions. We’ve cooked hundreds of meals on these stoves to evaluate performance, fuel efficiency, and reliability. Our editorial integrity is never compromised by affiliate relationships—we recommend the same stoves to you that we use on our own camping adventures.
The prices and availability mentioned in this article are accurate as of the publish date but may change. We encourage you to verify current pricing and read additional customer reviews on Amazon before making your purchase.
Thank you for supporting The Gear Trail by using our affiliate links. Your trust means everything to us, and we’re committed to maintaining complete honesty and transparency in all our gear recommendations.